Little Pharoah

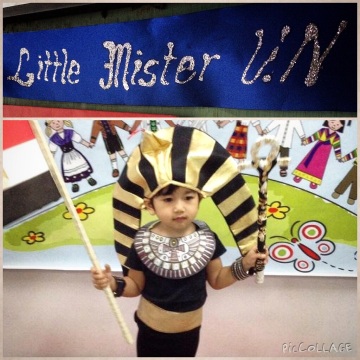
D-I-Y. It seems that D-I-Y-ing is all I ever do these days. But I don’t mind. It awakens my senses and I feel great especially if my D-I-Ys turn out great. Like the Egyptian costume for The Little Creature #1.  He was assigned as Little Mr. Egypt for their United Nations Day Celebration in school yesterday. Because I’m too cheap to shell out mega cash for something that would be a one-time wear, I decided that we should just make the costume.

We did buy the headdress for P295 in Greenhills.  I should have just made one.

 There’s a set of plain black shirt with a pair of black pants and a belt and headdress which were packaged and marketed as an Egyptian costume for P1000. I’d be crazy to buy that especially when I have a closet full of black shirts. Even sillier, a pair of black toddler leggings cost P200 while an adult-size pair can be bought for P100! But why buy when I also have a closet full of black leggings?

Because Egypt is such a fascinating country and I used to obsess about ancient Egypt many years ago, it was fun to D-I-Y and I secretly wished I was making the costume for myself. 

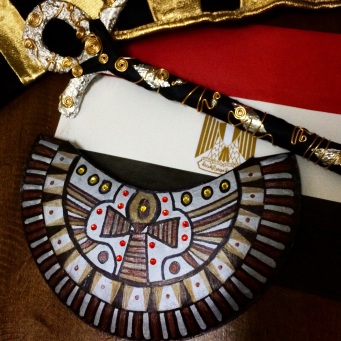
I cut out a sort of eye shape about the diameter of the little one’s neck from a paper plate, put strips of velcro on the back, painted it with silver poster paint, and doodled on it with Pentel and Sharpie pens. Add some shiny red plastic stickers and there you have it, a Royal Egyptian neckpiece! It doesn’t look like a paper plate, right?

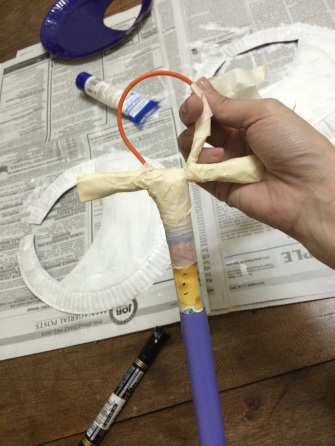
As for the ankh scepter, I used the following for the base: handle of his plastic golf club, my plastic hair loop for the ankh loop, and wooden stirrers as the two pointy things on the side. I taped them all together,

D-I-Y Egyptian Scepter Ankh

… wrapped them in aluminum foil and black satin ribbon, and finished them off with random swirly copper wires. My crash course on wire jewelry last August with Craft Manila came in handy!

Egyptian costume: ankh scepter and collar

If I had more time, I might have done some other prop with hieroglyphic doodles on them. And if he were a girl, I might have put some Eye of Horus-ish makeup on him.

I knew there were kids in much grander costumes so I wasn’t expecting any award. It was just a relief that he wore the costume. He refused to try it on so I had to eyeball the sizes of everything.  He even had to be convinced that the headdress and the neckpiece made him look like a triceratops.

So the last thing I expected was for him to be awarded as the Little Mr. UN! 

Egyptian costume toddler 

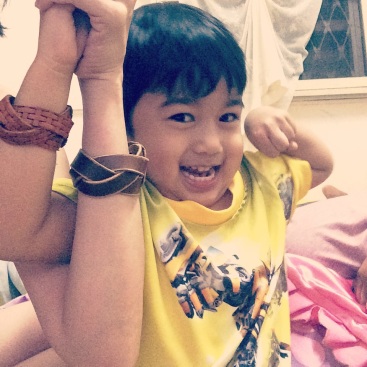
The little boy-king in his mommy’s clothes – my black shirt, my black leggings, my leather cuffs. Cute!
 

Toddler Fashion? Forget about it

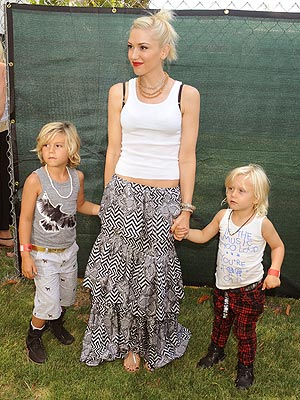
EXPECTATION:

Gwen-Stefani-Kingston-Zuma

…to have a brood of Rossdale-Stefani children clones while, of course, rocking motherhood like Gwen. Kick-a** mom and kick-a** boys, right? And don’t get me started on the Rossdale dad.

REALITY:

dinosaur toddler

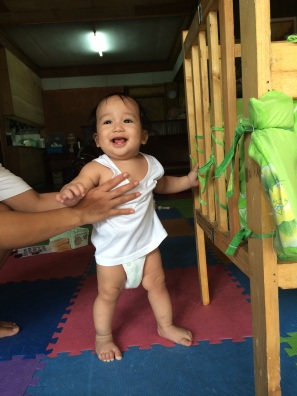
Baby at 7 months

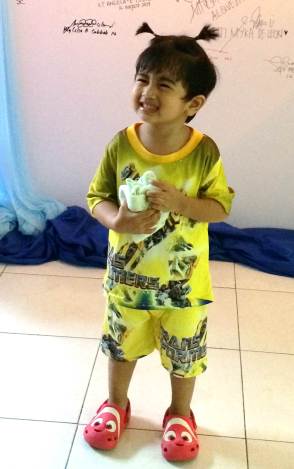
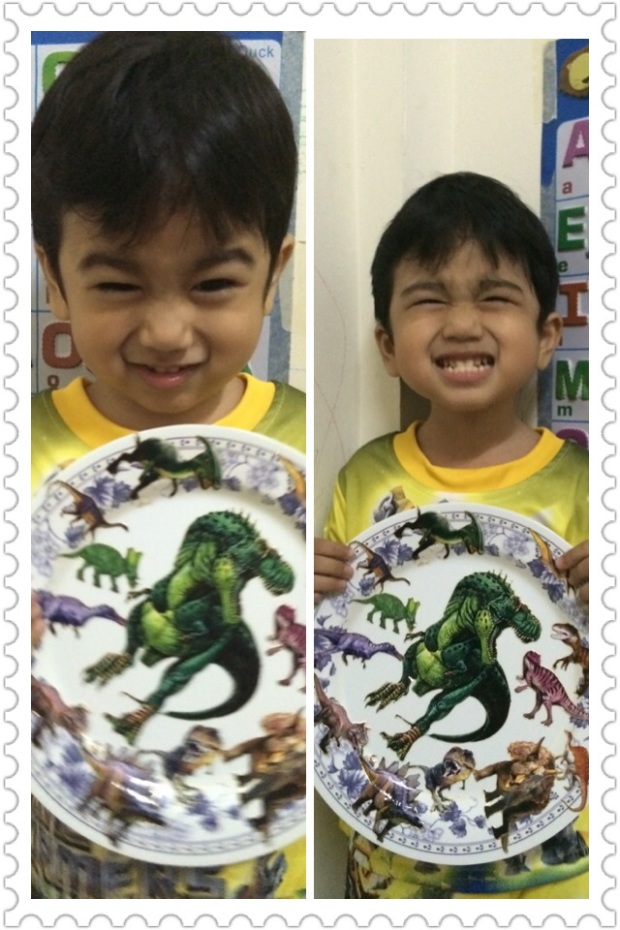
It’s understandable for our little baby to wear that (one of the many hand-me-downs) especially in this weather, but for his older brother, well… That set of yellow clothes he is wearing in the picture with a print of Bumblebee, he just refused to take off. We had to buy a second set so we could wash and wear. For about a month, he refused to wear anything else… and sleep in anything else. The one other thing he wears in great reluctance is his school uniform.

Good thing he has forgotten about those hair ties. He looked like a girl but he thought it made him look like a triceratops. He also loves those ugly Nemo shoes which I bought in Divisoria so many ages ago for just P150. In all fairness, the pair is very sturdy. He wears them almost all the time.

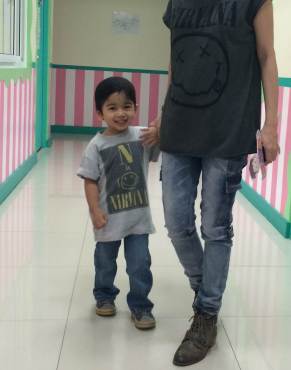
I did get him to wear something that I liked (wheee!)… for a few hours.

Nirvana shirt toddler

But the pull of the yellow “damit” (that’s what he calls them shirts and shorts) is just too strong. 

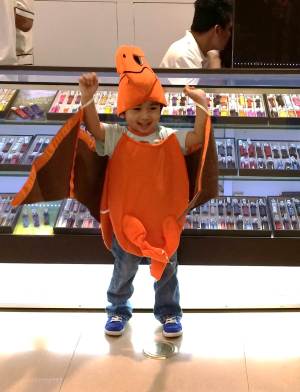
Also, we got him a pterodactyl costume for trick or treat which he chose from the rack himself last weekend so now he wears it all the time, including in bed.

Pterodactyl costume toddler

I wanted to dress him up like some mini Johnny Depp weirdo character for trick or treat but how can one deny him his dino costume when he looks so happy? He wore the costume immediately after we bought it.

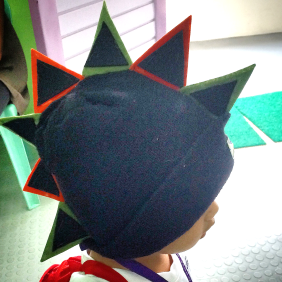
For his school Hat-Making Contest yesterday (parent-child tandem), he demanded (yes, DEMANDED) that he wanted us to make a triceratops costume. While other parents made cardboard witches and wizards and pumpkin hats, I was sewing spikes on his beanie. Due to time constraint, I was able to make a “stegosaurus” beanie:

dinosaur beanie

Yep, I took a leave of absence from work to make that.

It was crudely and untidily and hastily done but HE LOVED IT! It all boils down to that, right? He didn’t want to take it off but he had to leave it in school for the judging. We’re not going to get a prize but him thinking that it was the best hat amongst all the other hats is the best prize ever. 

It kinda looks like some punk/rock thingie, too, I just might make one for our little baby and maybe for myself. 

I got the instructions from this site:  DIY Dino Hoodie.

Toddler and baby fashion? Yeah, well, let’s forget about it for now. There’s plenty enough time to “Eliza Doolittle” the little ones when they’re not so little anymore.


It’s Raining Dominoes!

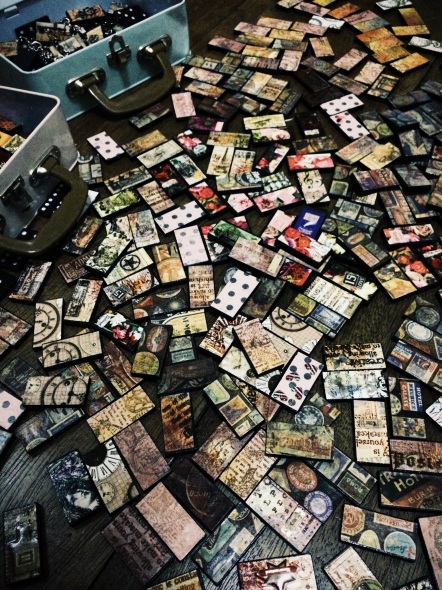
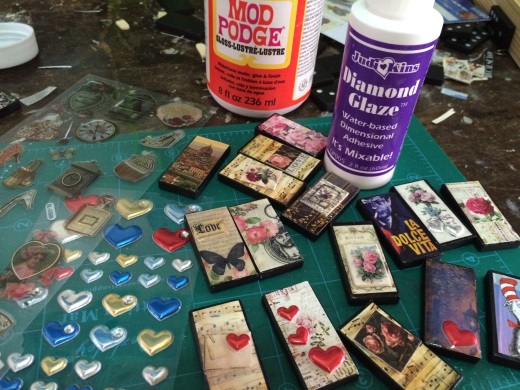
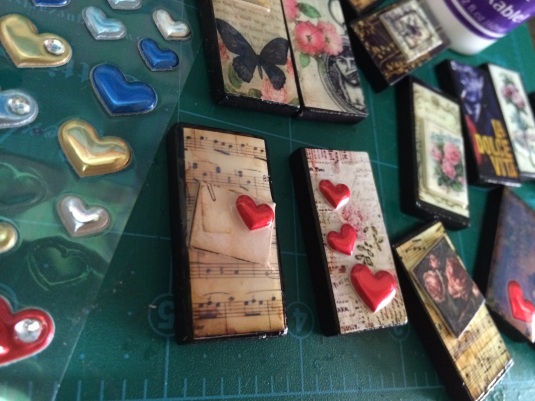
That’s not even all of the dominoes I’ve altered and decoupaged in the last couple of months. Obviously, I have no social life. But that never really bothered me anyway.

altered and decoupaged dominoes

The Little Creature #1 has gotten used to my clutter so I don’t have to growl and glower at him so much anymore when he sticks his nose and digs through my mess. I can now do my craft with him around. He has lost interest in my tools, which is a relief. He used to take my pairs of pliers which he says are pterodactyls. Now he still does swipe a couple of stuff now and then and then loses interest in a few seconds. He’d leave them wherever and all over the house so it isn’t unusual to find a stray domino or bottlecap or bead on the shelves, on the floors, on the dining table, and even on the bed. Now, Little Creature #2, is a different story. He’s at that stage where everything looks good (and maybe tastes good) so they all end up in his mouth. Husband and the nanny oversee him while I produce more clutter.

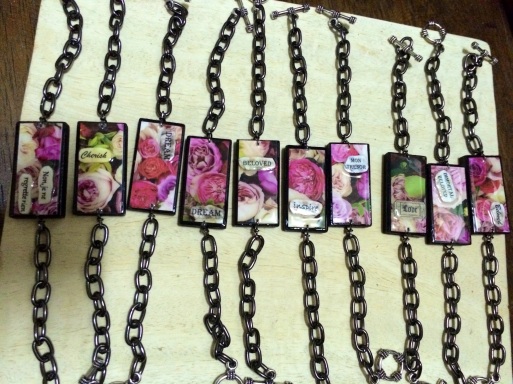
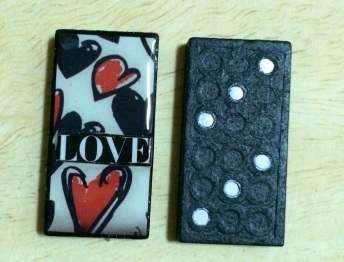
I’m planning to make those dominoes into something wearable, like a charm for a bracelet or necklace and then sell them in pop up fairs once I have enough, but yesterday, I had a little fun with some.  What nonsense! What fun!

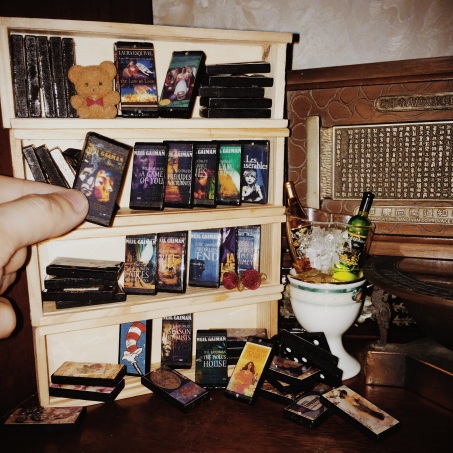
Come and visit my library. Have a bit of wine while you read about Morpheus and his family of weirdos.

altered dominoes as little books

Craft-All-I-Can

That’s what I’ve been up to these days. Writing has taken a backseat. Not that it has ever been on the driver’s seat these days… or riding shotgun. Whatevs.

I’ve had so much fun that I joined a couple of other craft workshops after the Resin Tile Making at Craft Manila. What’s up with the D-I-Ys and the crafting lately? Let’s just say I’m building my capabilities and a safety net, too, for when my life as a corporate worker bee ends. We’ll never know when it is going to end.  Also, I’ve been hit with the crafting bug and has been going on since June, when I started with the bottle caps. I usually just trudge through life indifferently like a zombie but now, I am excited  to make more stuff and learn techniques. My outputs are often crude and I’m an impatient, messy and sloppy crafter but I’m having so much fun. Crafting is costing me some moolah and moolah is important but it is still a small price to pay for being high with motivation and excitement.

Anyway, here are the workshops I’ve joined last August:

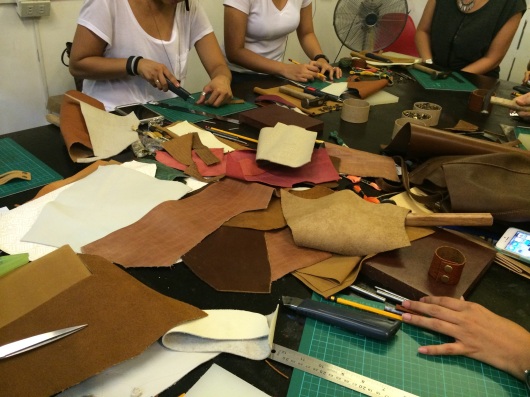
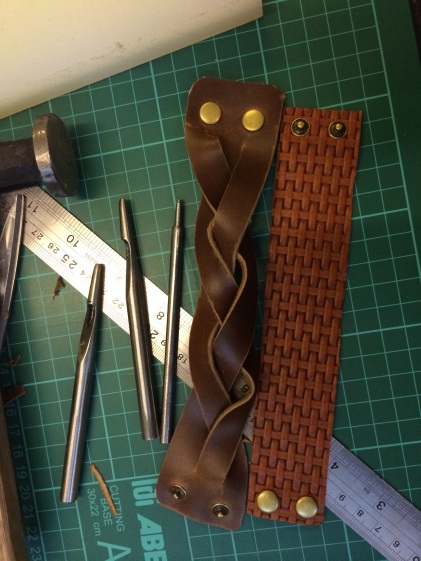
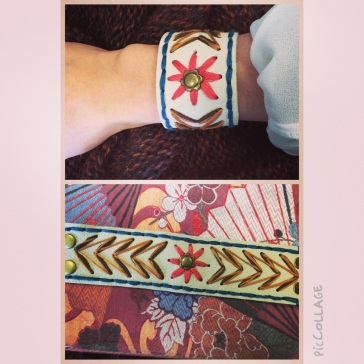
Leather cuff making. The workshop was taught by two young ladies from Soul Flower. I learned to make the magic braid and to mount the buttons.


IMG_4769.JPG

Additions to my fast growing tool set: puncher, setters, and another hammer:

IMG_4768-0.JPG


We went overtime so we didn’t get to finish practising. We did get to bring home as much leather we wanted to practice on.  So far, here are the rest of what I did:

Pattern courtesy of Soul Flower:

IMG_4883.JPG

Ah, so proud of mama’s work!

IMG_4859.JPG


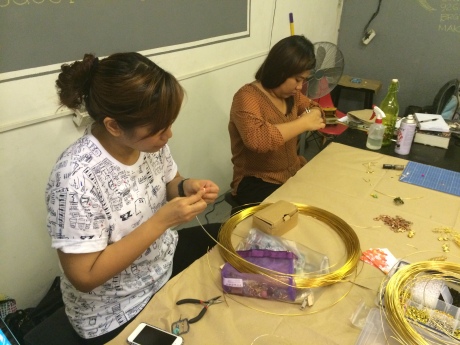
Wire Jewelry Making by Wire Guru Ana Gonzales.


Wire Jewelry Making @ Craft Manila


Here are some of what I did.

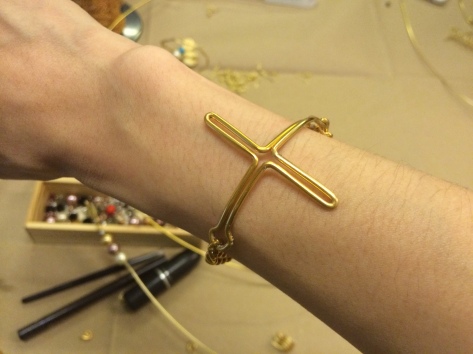
A cross bracelet…

wire jewelry: cross bracelet


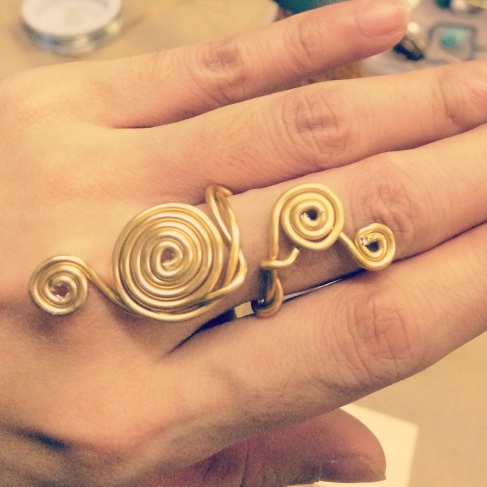
…a swirly swirly ring…

wire swirl ring


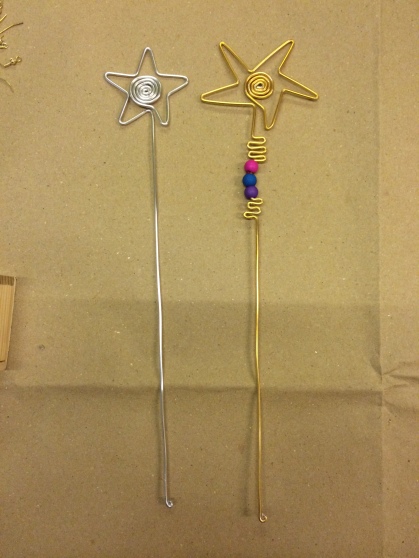
…a distorted star bookmark/paperclip. The silver one was done by Ana herself. I tried to copy it but my gold star turned out weird. I just pretended that I was actually going for an abstract star/magic wand.

Wire star


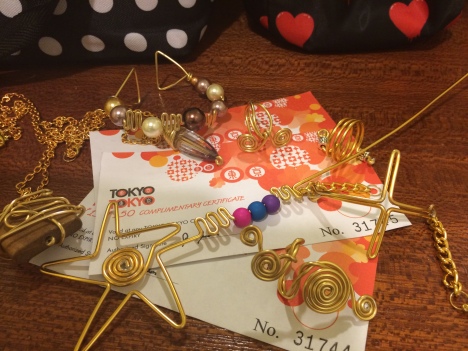
Did several others, too. These wire works won me gift certificates from Tokyo Tokyo!

Wire jewelry

There were just four of us in the class, but still, I’m so flattered! Thanks to blogger Arnie Villanueva for choosing my stuff.

I’d love to join more arts and craft workshops but for now, I am focusing on my new-found craft: decoupage and altered dominoes and bottlecaps. So far, I have not encountered anyone who does the domino thingies yet.   I’ve been splurging on inks and rubber stamps to create backgrounds for the dominoes and bottlecaps rather than printing them or snipping them from magazines. I’ve been stamping here and there and here and there… not as easy as I thought. And now, the whole process of making an altered domino tile takes much longer because of the stamps. One of these days, I need to write down the steps before I forget them.

Magazine Cut-Outs

I’ve been snipping this and that from magazine pages lately — whatever stuff I think would look nice in a bottle cap or on a domino. I don’t usually read the articles before. Usually, I only drool over the clothes and shoes and makeup. But because I have to, I began reading some of the texts.

Wow. The words, the phrases, the paragraphs, the articles — how very, ehhh, ornate. Excessively ornate, if they could be described as such. And confusing. Literally.

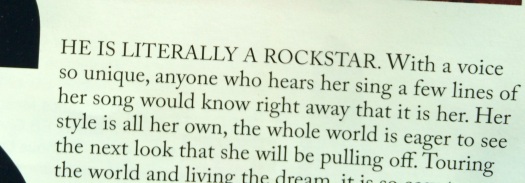
Use “literally” in a sentence.

IMG_4866-2.JPG

That’s from a local fashion magazine. “Literally” was literally used to emphasize somebody’s shining rockstar-ness. Literally a vague intensifier, that one. And that third sentence which literally began with “Her style…” literally feels off, as if there’s literally a word missing or, that another punctuation should have literally been used instead of a comma in the middle of the sentence.

But who am I to snootily correct a popular magazine? I’m really no grammatist. I have committed grammar crimes that would send chills down the spines of my English teachers. Plus, I literally only have two grammar rules: if it sounds and looks good, then it must be correct; and, if you’re not sure, google it. Like, literally.

I’m just feeling bitter and resentful and jealous of those who landed jobs in the field of fashion just by literally stringing 10 superlatives together in a single sentence.

I should be grateful. To be fair, the texts are over-the-top that I have literally more than enough cut-out words stashed for future projects. And also, I came up with this without meaning to — literally a wake up call.

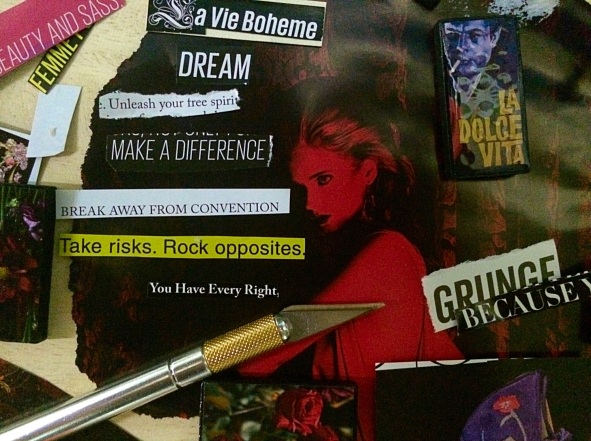
IMG_4797.JPG


There’s an exacto knife. But why? It does go well with her red complexion. The knife makes me feel paranoid sometimes. It’s so sharp that it seems as if it literally has a life of its own and I’d get stabbed with it by it one day.

D-I-Y: More Altered Dominoes

I bought an additional dozen set of dominoes. Last Saturday, Husband and I searched for the stall where my dad bought them for Php25 each in Divisoria but we couldn’t find it. Just when I had thrown in the towel and admitted that my dad indeed knew Divisoria better than I did, Husband and I came across this toy store which sells the set for only Php20! El Cheap-o! 

And right after I bought the dozen sets, Husband and I stumbled upon the toy store that was just across 168 Mall which my friend Celina told me about before when I asked where she bought the dominoes for also Php20 each set. At least, now we know, in case I need more dominoes. As
If I don’t have enough.

I’m glazing and turning them into something else but I don’t know what I’m supposed to do with them after that. It’s so much fun though, and they’re so cute after they’re glazed.


IMG_4720.JPG</a

I still don’t know what to do with the microbubbles. I can’t pop them with pins. I try to scoop them out before the glaze dries but there are still bubbles that I miss because they were so tiny. I read somewhere that I could pop them by heating them with a hair dryer. Must try that some time.


IMG_4721.JPG

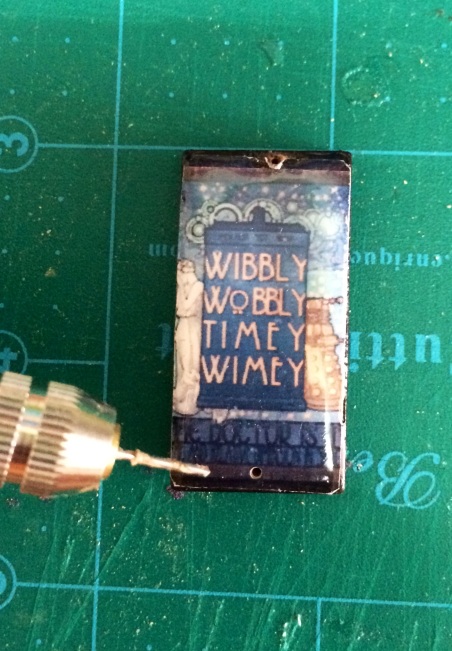
I learned that I get cleaner holes when I drill on them AFTER glazing.

IMG_4723.JPG

The hole above, I drilled before glazing so I had to work around it, trying not to fill it with glaze.  The hole below, I drilled after the glaze has dried.

Here’s one that I’ve spray painted and embedded with beads.

IMG_4779.JPG


I’m still product testing and so far, the color has not faded and stained my clothes.

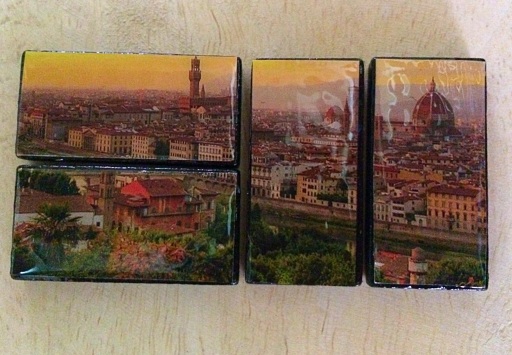
This one below is a picture of a place in Italy which I tore off from the local fashion magazine, Metro. I don’t know what to do with it.

IMG_4775.JPG

But pretty, yeah?

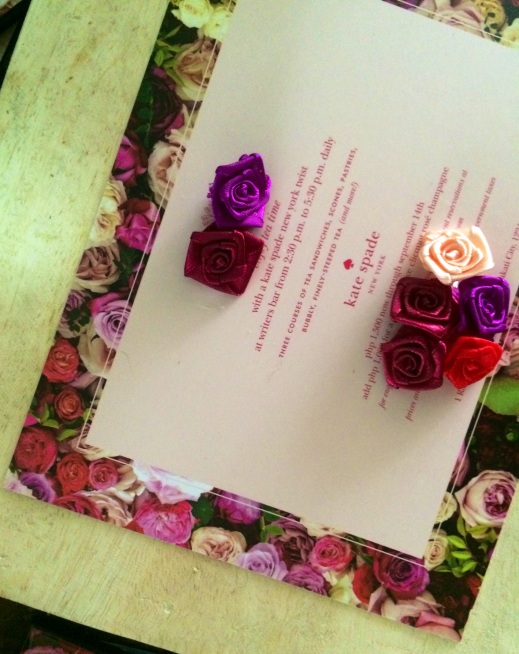
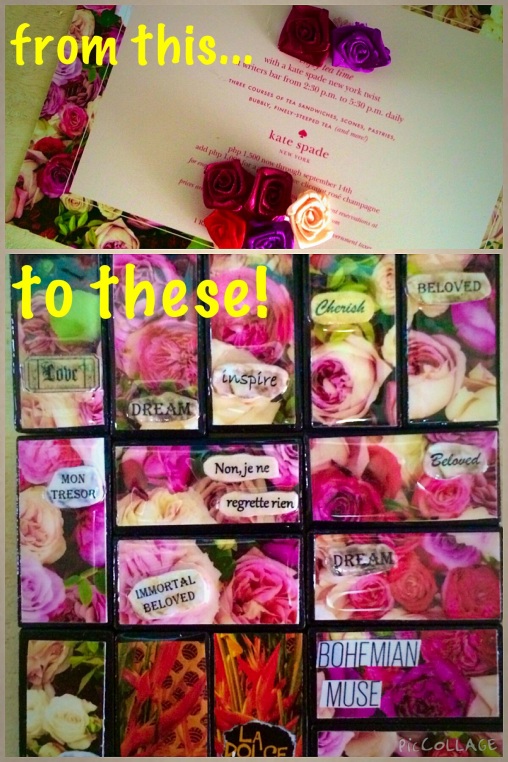
Here are more. I got the floral images from the border of an invite from one of the local hotels that my colleagues and I conducted an ocular inspection in a couple of days ago.

IMG_4815.JPG

Pretty, yeah? And so mushy. It’s a little early for Valentine’s Day. IMG_4824.JPG

I’m giving these to some lucky lassies because I took their invitation cards.

IMG_4828.JPG

At home, beads, bottle caps, domino tiles are scattered not just in my work area but all over the house, no thanks to the Little  Creature #1 who loves to swipe and play with my materials and then leave them wherever.

IMG_4784.JPG

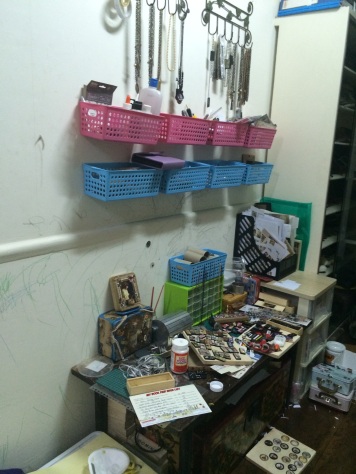
I do try to keep my mess confined to my corner but I hate being organized. I feel like my brain is being restricted or restrained. Plus, cleaning up afterwards takes time. I love seeing my materials all over in a huge, crazy jumble because that is when I see all the colors and become more inspired to create something.

This is part of a Lancome ad that I cut out from a mag. I embedded the mushy word. More lovey dovey. Cute.

IMG_4829.JPG

D-I-Y: Altered Tin #2

This used to be an old Kiehl’s tin which contained 4 tubes of lip balm (I gave away a couple) and I may have had the tin for ten years or so (quick review: lip bummed so thumbs down).

IMG_4670.JPG

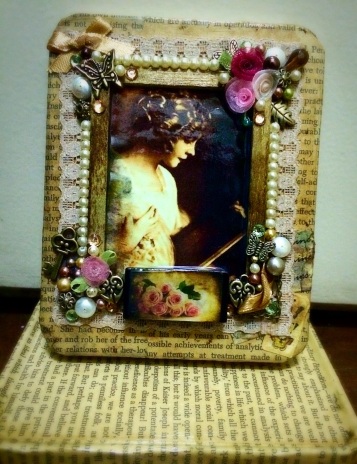
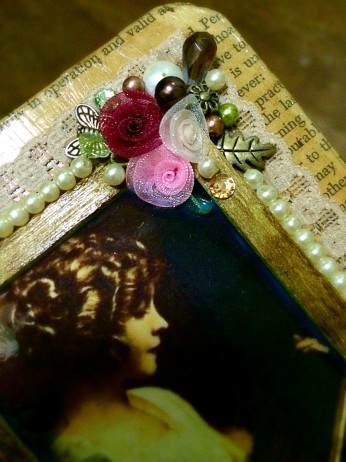
A tribute to Lillian Gish. I cannot recall watching any of her movies, but I do love old Hollywood and she looked really beautiful in this picture.

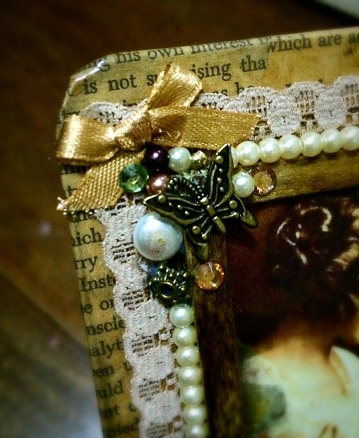
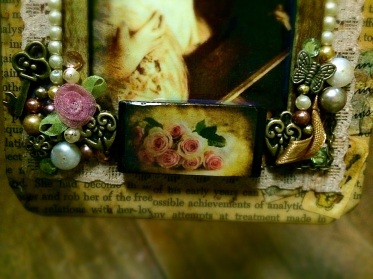
Again, I had no design in mind, just like my first try at altering tin. I just kept adding and adding and adding, mostly to hide the mistakes like the wet spots and dry glue. I had to stop somewhere because I might end up covering everything. Again, it’s more shabby than chic.

IMG_4671.JPG

I used old and crumbly and crispy and yellowing pages from Freud’s “Introduction to Psychoanalysis” which I found in the shelf at home. It was probably a 60’s publication. No one is going to read it, I most certainly won’t, and time has almost destroyed it but I still felt a little guilty tearing some of the pages. There is no profound or psychologically-related meaning as to why I used the pages from the book. It was just there. And it was falling apart anyway.

IMG_4672.JPG

materials used: old book pages, fabric flowers, satin ribbon, lace, a wooden stirrer for the frame, distress ink for the stirrer, acrylic pearls, glass, and metal beads, rhinestone stickers, a couple of freshwater pearls, domino tile, dimensional magic, mod podge.

 IMG_4673.JPG


I did this project a couple of weeks ago. Mod Podge is still sticky. I need some sort of sealant.

Looks like I’ve inspired someone to get crafty as well.

Dat face.

IMG_4771.JPG

He did this a few days ago and he brings it with him at all times. He’s so proud of it that he even brought it to school to show to his teacher. I mod podged the stickers on the plate because he gets bothered when they fall off.

D-I-Y: Resin Tiles

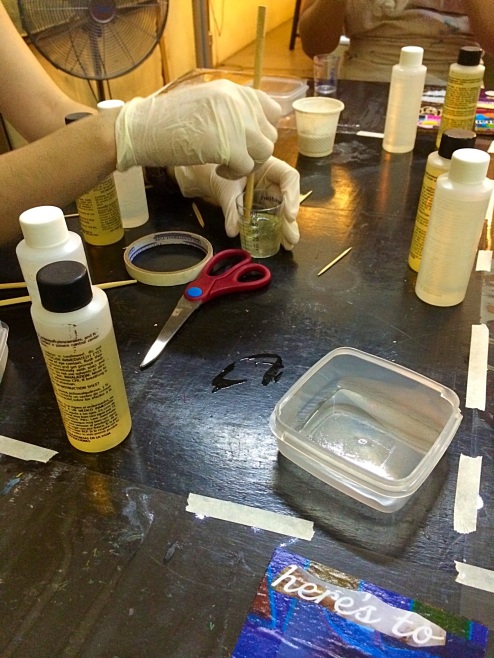
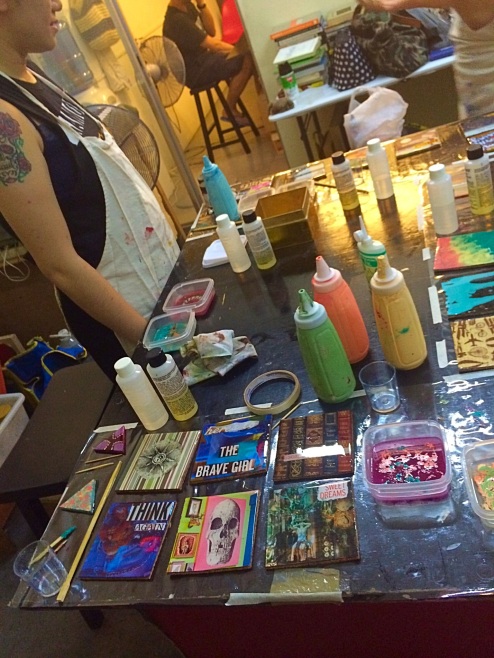
Joined a Resin Tile and Coaster Making Workshop @ Craft Manila last weekend. The instructor was artist Nikki Abelardo.

Crafting is taking over my life. Again. Am not even making an effort to prettify my writing. I just want to post pictures of the stuff I did so that I will have memories of them before they crumble or get destroyed by the Little Creature #1.  Who is taking care of the kids while I hide from the world in my sweet, sexy B.O.D. (Bubble of Denial – it’s my version of the Tardis)?  I am not sure anymore… What kids? haha.

It was a two day workshop because we had to wait for the resin to dry overnight.  There were just 3 of us students.

How to get to Craft Manila:

IMG_4691.JPG

IMG_4689.JPG

IMG_4690.JPG

Cool, but was I in the right place?  Was my initial thought. Yes, I was.


Day 1: Preparing and priming the pieces. This took me some time.  Teacher Nikki said, “minions, choose your designs,” and she pointed to this big plastic box filled with old magazines, scrapbook papers, and other papery junk.

Ehmagahhhd, the pressure! I rummaged through the papers in silent panic. What designs?

I thought of going for the sweet, feminine, shabby chic look for lack of other ideas so I initially grabbed a pile of floral scrapbook papers. But that semi-goth-semi-grunge- straight-edgy -part-of-me-that-I keep-burying-deep-deep-deep-down-which-I-thought-I-had-gotten-over-by-now-because-I-am-getting-too-old-for-that-sh**-eh-I-mean-stuff, was struggling to get out, as usual. So, it got out and led me back to the plastic box until I got the images that just felt right but made me feel a bit conscious because the others might think that some were a little odd… and scary.

Busy-busy-busy, mix-mix-mix.

IMG_4682-1.JPG


The worktable. I’ve poured the resin over the tiles. Those microbubbles, they ruin everything!

IMG_4683-1.JPG 

Day 2

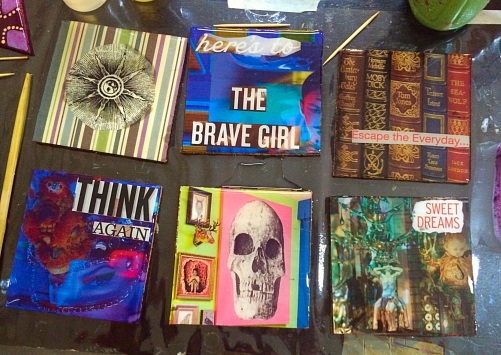
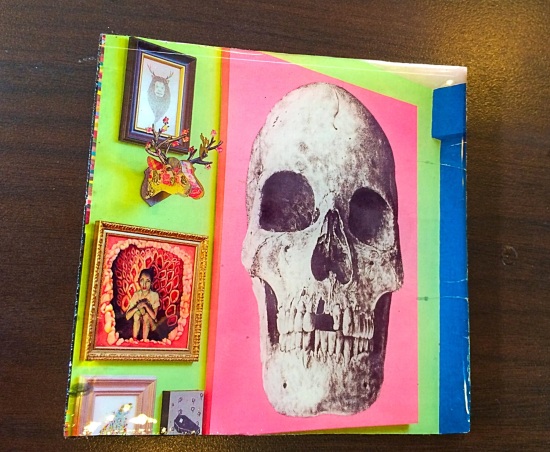
They’re far from perfect, with the microbubbles and the wet spots, but I’m happy with the images. The random words actually fit nicely with the random pictures.

IMG_4685.JPG

These are my favorites:

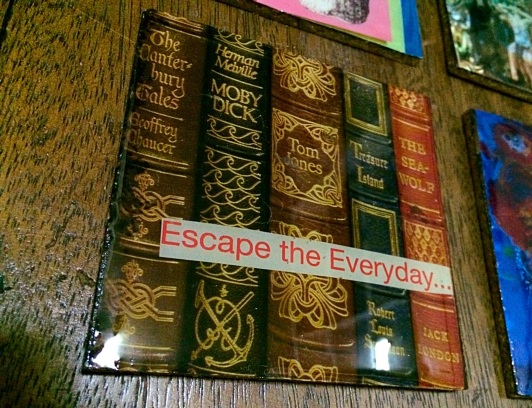
“Escape the everyday” – sounds Doctor Who-ish to me, you know, the Tardis thing and well, “books! The best weapons,” he said)


IMG_4686-1.JPG


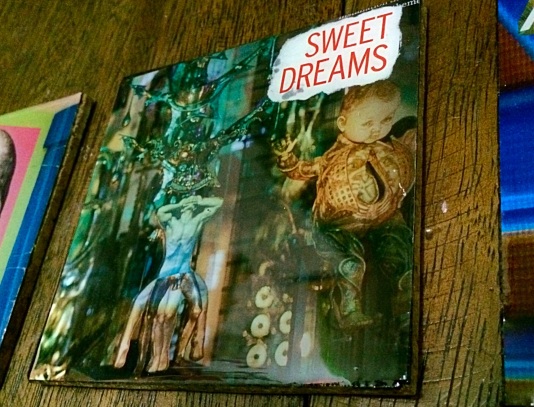
“Sweet dreams,” I realized afterwards, seemed a bit sarcastic and sinister, as if the creepy baby was saying it with malicious glee. Sort of reminds me of Dave McKean’s surreal art (I do flatter myself as I compare my amateur art with his). Then there’s the naked guy with several legs and his twiddledeedee hanging out. I swear, I did not see the twiddledeedee until after the resin has dried (we-ell, it was tiny!).


IMG_4687-0.JPG


No text for this one. I shall call it “The Watcher”. And that framed painting on the left with the person sitting like he/she is sort of scared? Kind of disturbing for me but I don’t know how to work it out of the picture. Shuda covered it with something.

IMG_4688-0.JPG


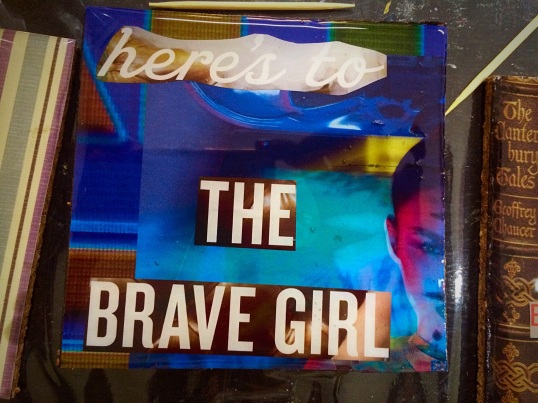
“Here’s to the Brave Girl”. Got the text from a Keds ad with Taylor Swift’s pic. It actually says “here’s to the brave girls”. A dear friend once wrote me a note saying I was brave. Am not entirely convinced but it was my the best compliment (and my favorite, too) I have ever received. Love the vivid blue.


IMG_4650-1.JPG


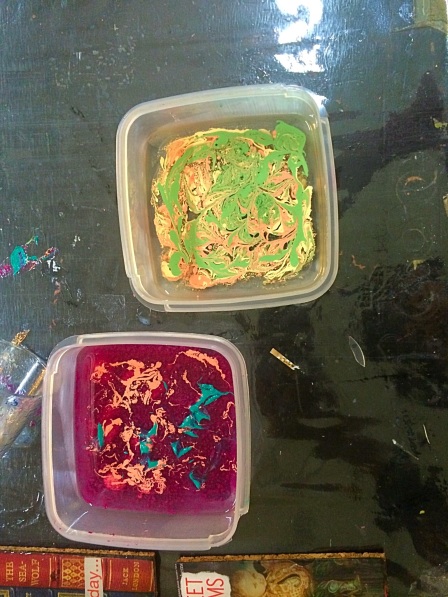
Now these, unfortunately, did not turn out well. Latex paint + resin = ugly blobs.

IMG_4684.JPG

Next week, I will join the Leather Cuff Making class! EXCITED. MUCHO.

D-I-Y: Doctor Who Designs

Husband and I are thinking of having these printed on t-shirts for personal use and WHO knows, maybe for business. I don’t claim to have designed everything from scratch and obviously the quotes aren’t mine but I did mash-ups of several images and did a little “fonting” so I could at least claim certain parts as my own. I don’t know where the original parts of the images came from anymore because I just got them from re-re-re-re-repins in Pinterest. But I will gladly remove any image if contested. And I apologize in advance. I did have fun redesigning the images. Yaiks, I haven’t outgrown my fan-girliness after all.

Anyway, here are my attempts at t-shirt or maybe shopping bag designs using Powerpoint (I never really got to my yearly resolution to learn How to use Photoshop):

IMG_4570.JPG

IMG_4571.JPG

IMG_4573.JPG

IMG_4572.JPG


IMG_4575.JPG

IMG_4574.JPG

IMG_4576.JPG

IMG_4580.JPG

IMG_4581.JPG


IMG_4579.JPG

IMG_4584.JPG

IMG_4582.JPG

IMG_4583.JPG


I love the picture of old Hollywood star Mary Pickford. The mashup with the Tardis image worked.  The look on her face… longing, wishing, hoping … I probably have that look whenever I’m alone.IMG_4577.JPG

IMG_4578.JPG

Challenge Accepted! D-I-Y: Altered Domino Tiles

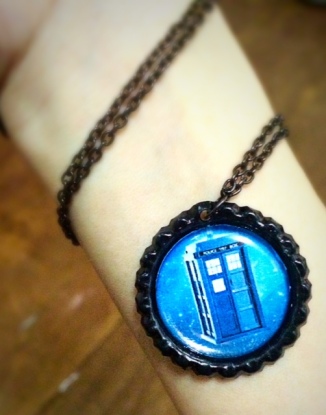
My friend Ciel over at Happy Blue Thoughts is also a fan of that Doctor and that Blue Box that’s bigger on the inside so I made this for her and a couple of other stuff.

Tardis pendant: bottle cap


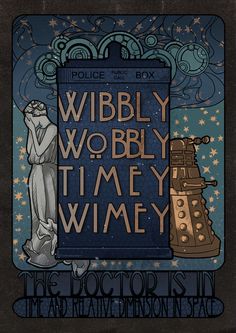
She wanted this art nouveau Tardis by someone named Koroa below in a bottle cap but it doesn’t fit the round bottle cap frame. It was just too pretty to discard. I also wanted one trinket with this design for myself, so…

Tardis Nouveau Art - Wibbly Wobbly Timey Wimey


 as Barney Stinson would say,

Barney-Stinson-barney-stinson


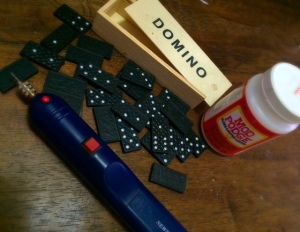
I remember coming across altered dominoes in Pinterest while searching for inspirations. So I rummaged through my junk and saw the set which the Little Creature #1 received from a friend’s son’s birthday last year as one of items in a huge box of party favors. The theme was something-something-science (read: geekozoid).

Aha!

domino tiles-mod podge-dimensional magic

From those…

To this…

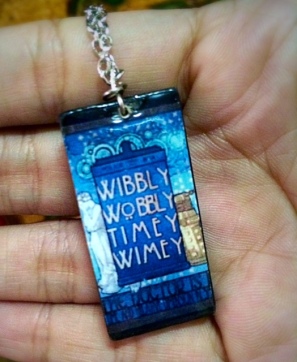
Tardis Altered Domino Pendant

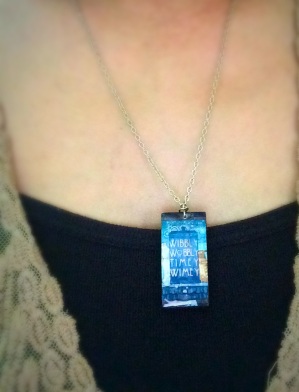
Doctor Who Tardis pendant


and these!

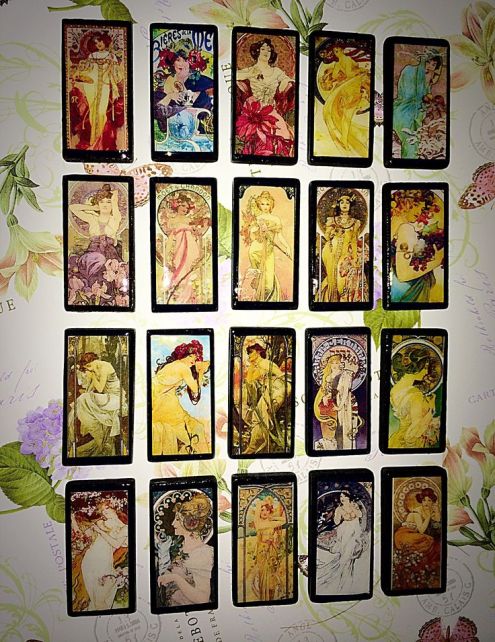
 Alphonse Mucha Art Nouveau


Art Noveau by Alphonse Mucha. It’s hard to make just one or a couple. And Alphonse’s art work is just so beautiful even in miniature. Don’t think I stopped at that. I asked my Dad to buy 8 more sets of dominoes in Divisoria. One set costs just Php25.  I’m ashamed to admit that he seems more familiar with Divisoria than I am. When Husband and I went there on the same day my dad did, we didn’t find a single set.

So now what am I supposed to do with all those tiles? Maybe I’ll have them framed. Or maybe I’ll wear them all as pendants.

D-I-Y: Altered Tin Can Using Mixed Media

Underneath all that junk is an image of Spiderman. I’m not really a Spidey fan so…


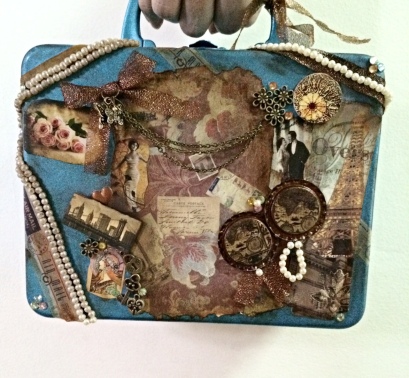
altered tin can: steampunk

This is my very first attempt to “steampunk” an item. It looks more “shabby” than “chic”. I may have used almost all the materials I could find, that’s why it looks very messy, and I really didn’t have a design plan in mind, but it was so much fun to do!

Materials used:

tin lunch box

shimmery blue spray paint (it’s not sealed yet. I was too excited to stick all that rubbish on the tin)

book mark

printed paper

wrapping paper

acrylic pearls

washi tape (it’s somewhere there)

spray painted and flattened used bottle caps

ribbons

double-sided foam tape to add dimension to some of the pictures

assorted metal beads

rhinestone stickers

mod podge

Elmer’s glue

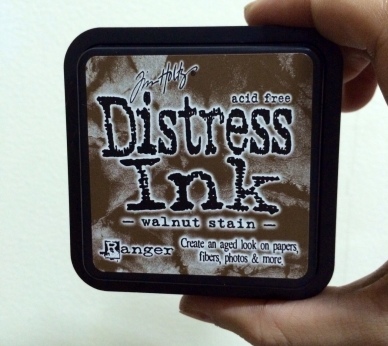
Distress Ink in Walnut Stain

and even some shimmery brown eyeshadow to add to the aged look! (I used Stila, haha). I have to figure out a way to seal the eyeshadow.

 I started this project last weekend while waiting for some other project to dry up. I had to do this in snippets of time, switching from being the Bratty Mom to the Crafty Mom whenever the Little Ones are asleep or distracted.

I’m not too happy about that shimmery blue spray paint but it was the only one available at that time. It looked too shiny and new.  I also ran out of it. I may have had too much fun spraying. Inside the box, Spiderman comic scenes are peeking through a thin coating of the paint.

To create that shabby-chic, aged look, I used Distress Ink which I recently just found out about and which I bought from Memory Lane Store. (OMG to the maximum! I wanted to buy everything in that store!)

distress ink in Walnut Stain

I’d like to try out some more of those Distress Inks but they’re too pricey.

D-I-Y Bottle Cap Pendants

So now we’re back to bottle caps.  I have hundreds of them now and it’s such a shame to just throw them away. I did these a couple of weeks ago. I’ve already experimented on some stuff since then but for now… 

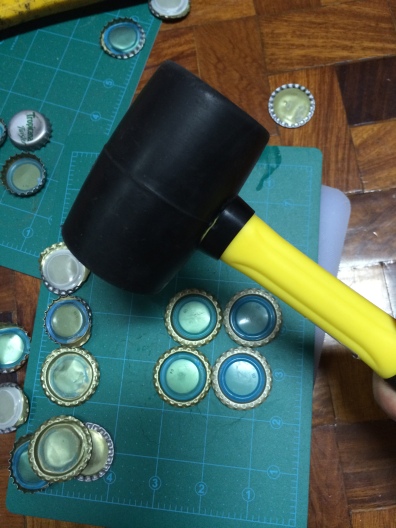
Version 1: I hammered…

flattening bottle caps


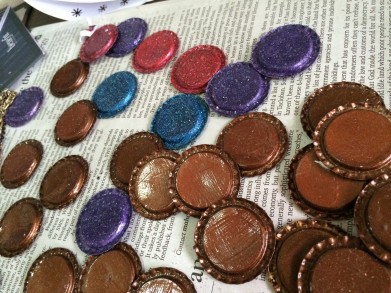
and spray painted (and nail-polished! I used OPI Liquid Sand on the glittery ones)…

spray painted bottle caps


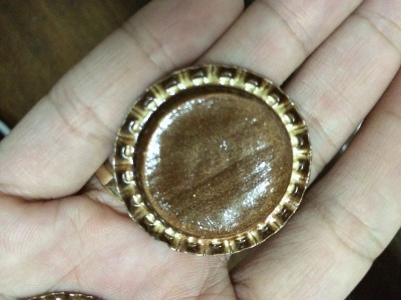
and layered the back with cardboard. Thor I’m not, so even if the inside part looked ok, the outer part of the cap was deformed. It looked like this:

flattened bottle cap

Bits of the newspaper which I used as a mat also stuck to the paint which wasn’t fully dry when I turned the bottle cap over to spray paint the other side. So I covered it with cardboard… and spray painted once more. It lost the gloss but at least the surface looked more even.

Then I mod podged…

flattened bottle caps

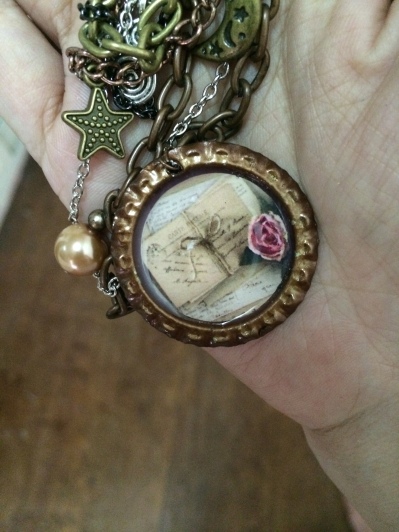
and dimensional magicked and attached it to some chains…

upcycled bottle cap


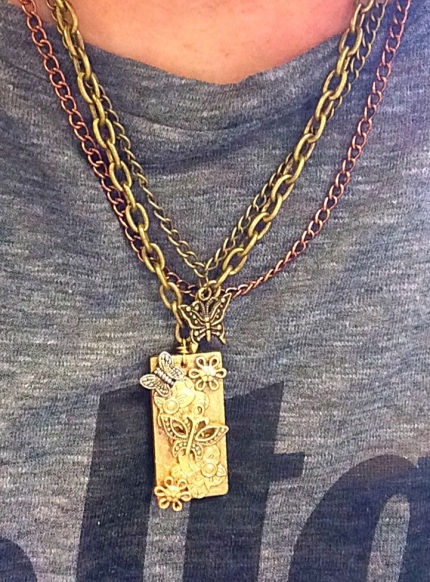
end result: a multi-layered chain necklace with a bottle cap pendant

upcycled bottle cap


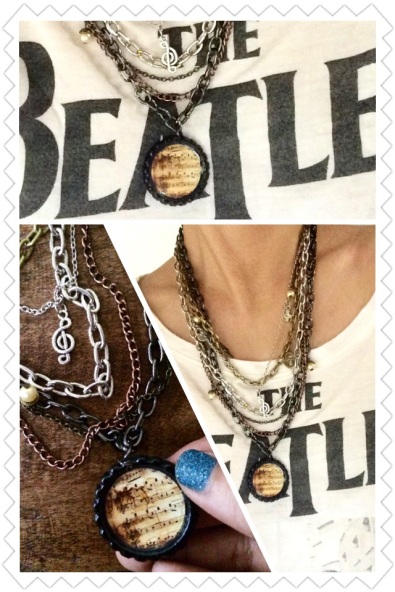
Version 2: I used epoxy sticker instead of dimensional magic and a factory-flattened bottle cap and attached it to some chains: 

bottle cap pendant

Life was easier with Version 2. And it looks better up close because the bottle cap was flawless and all I did was put the sticker to add dimension to the image. 

The first pendant took time to make. The spray paint alone took almost two weeks to dry because of the muggy weather. It was also harder work since I started from scratch with the used bottle cap and the hammering and the spray painting and the mod podging. And the bottle cap was flawed. But it felt more fulfilling to make!

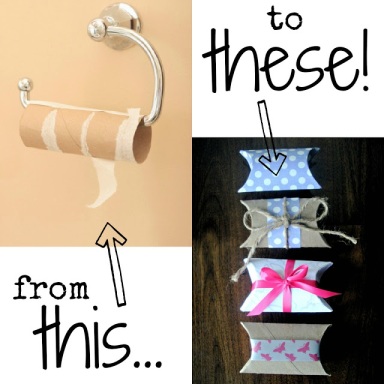
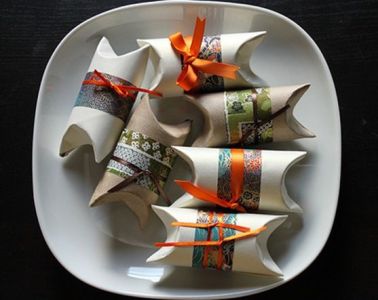
D-I-Y: From Toilet Paper Rolls To Teeny Pillow Boxes

Here are my inspirations for this project:

From Sweet Charli:

toilet paper rolls


From Roadkill Rescue:


toilet paper rolls into pillow boxes


My Did-It-Myself project:

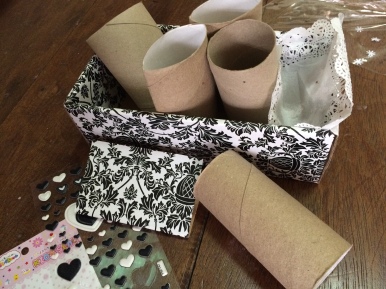
With the following materials: toilet paper rolls, used cupcake doily, scrap ribbons, glue, stickers…

toilet paper rolls and scraps


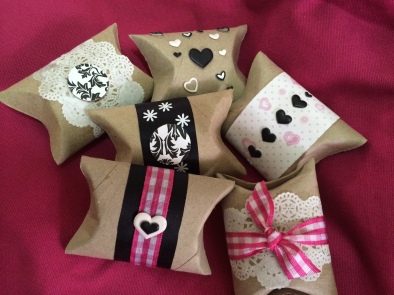
I came up with these:

Ta-DAAAA!

toilet paper rolls pillow boxes

 
Great for trinkets (like bottle cap thingies)! There are just so many fabulous inspirations in Pinterest.  Next projects to try: altered tin cans and domino tiles.

D-I-Y: A Stab at Typography Messaging

I’m hopping on the typography messaging bandwagon (via powerpoint, it’s the only thing I could do for now). Here’s my first attempt:

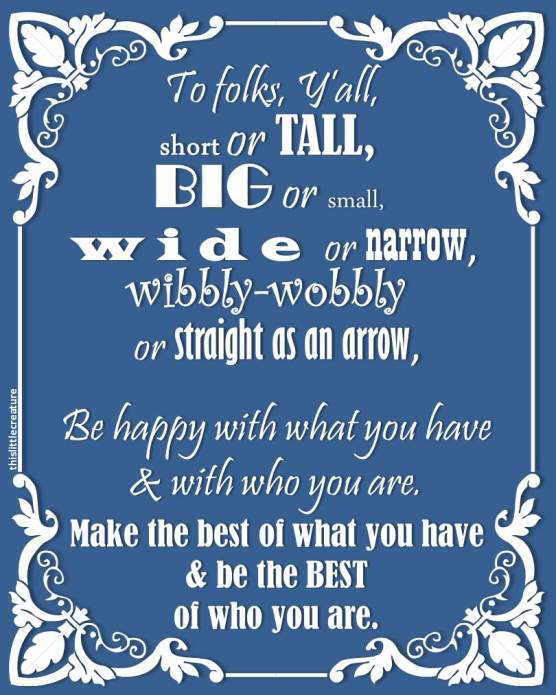
typography message: Be happy with who you are


Also, this issue about my weight (yesterday’s rant) must bother me more than I let on and more than I realize because I actually spent some precious time creating that message (credit to Doctor Who for the “wibbly-wobbly” and that sort of Tardis blue shade).


And I actually have already written something about my skinny arse in 2010.


Which reminded me of a funny thing —

There is this popular riddle in the Philippines —

“Buto’t balat pero lumilipad.” Skin and bones yet it flies.  The answer: a kite.

— which my dad modified… to suit my specs, of course:

“Buto’t balat pero ‘di lumilipad.” Skin and bones but doesn’t fly. The answer: ME. duh.


I thought it was silly. But for some strange reason, I liked it. A riddle about me. Cool! 

Hmmm… he also used to say I looked like Yoda. I loved it.

I guess it’s how he said these things. He wasn’t being insulting. And like I said before, it’s just a matter of perspective.

D-I-Y: Bottle Caps, Bottle Caps, Bottle Caps

Yes, I’m on a roll here and I’m obsessed.

These were the favors we gave out in the Little Creature #2’s christening two weeks ago:


bottle cap key chain


I thought the puffy and acrylic stickers would be tacky but they turned out better than I expected.

bottle cap key chains

Here’s a closeup

bottle cap key chain

I had to resist the urge to use edgier rocker/geek/semi-goth designs which several of the guests might find a little, eheheh, off. Glad that the designs I used worked. They actually went nicely with the bottle caps. There is that quaint- dainty-retro-vintage-antique vibe.

bottle cap key chain

bottle cap key chains


I don’t usually like to repeat designs but the maps and the mails/letters look really nice and vintage-y. And they don’t look too girly. I even gave one to my dad.

bottle cap key chains


I want to make more of these!

Warning: More bottle cap posts in the coming weeks (or months).

A Merry Easter Christmas To All and To All a Good Year

20131225-165810.jpg

Santa Claus got together with the Easter Bunny (meaning me and hubby) to bring a bunch of giant eggs over to our home a little earlier than usual. Anyway, both holidays are similar when we come right down to their Christian meaning which is the celebration of life: Christmas= birth of Christ; Easter= rebirth of Christ…

I am not sure who the Santa and the Bunny is between me and hubby (I’m probably Santa with my round belly that’s like a bowl full of jelly) but I am taking credit for masterminding this idea. The Little Creature#1 does love eggs, especially those that he watches in Youtube with little surprises in them. So we decided to put our gifts to him in eggs. Unfortunately, we couldn’t find giant plastic eggs to use for bigger gifts so we (really, this means “I”) decided to make our own paper mache egg containers. We have decided to forgo the egg hunt. Where were we supposed to hide these giant eggs?

Do-It-Yourself Giant Paper Mache Eggs

The materials for the initial preparation:

Old newspapers cut into thin, long strips

Cornstarch paste: I have no idea how the measurement for cornstarch and water was done. Hubby concocted it. I guess he made a guess. But as experience told us, a more runny cornstarch worked better. I added a pinch of salt to taste. Kidding. The salt, according to some websites, is for preventing mold.

Paintbrush: useful but I found that flattening the layers of paper with my fingers worked better.

Balloons: blow them up to the size you want the eggs to be. Then paste and layer on the strips of paper.

Warning: This is a messy project so you better spread around a lot of newspapers to cover the furniture! (Which hubby didn’t do the first time so my dad’s table got covered in ick. So we moved our work to the floor. Good thing that a lot of the materials are water based so the spatters were easy to remove.)

20131225-172804.jpg

Layering with strips of newspapers. We found out that long, thin strips worked better than squarish ones. Less lumps that way.

20131225-173137.jpg

Drying and sunbathing eggs in between layering. My, my, what big guavas the tree has. And what is that round thingie growing in my dad’s bougainvillea?

20131225-173552.jpg

Layering white papers to lessen the use of base paint. Looks like we’re breeding aliens or something.

20131225-174131.jpg

More alien eggs sunbathing. Am expecting Lt. Ellen Ripley to come out and destroy the eggs anytime now… powpowpow!

20131225-174325.jpg

Coloring time. I used acrylic paint for the base and poster paints for designing the eggs. Hehe, a Tardis egg. I just couldn’t resist.

20131225-174802.jpg

I had this ambitious idea of doing some elaborate Faberge egg-ish designs but we were running out of time. The easiest way I could think of was to do the old toothbrush/strainer spatter art.

Testing the spatter art on the store-bought plastic eggs wrapped in bond papers. Made me feel like I was back in grade school art class.

20131225-175407.jpg

Hubby cut the giant eggs cross-wise all the way through, placed the gifts inside, and sealed the eggs with masking tape before I painted on the eggs.

The finished products on Christmas morning. As the Little Creature #1 likes to say these days, ta-da!

20131225-180124.jpg

Of course, only Mother Nature (and Faberge) could make perfect eggs. Our eggs turned out to be lumpy and hubby blamed me for that, for not gluing the newspapers as flatly and as neatly as he would have liked. Well, we were under time constraint! We had to be done by Christmas morning! Anway, the Little Creature#1 doesn’t mind.

20131225-181148.jpg

I thought we were going to make just two or three eggs. Out of the pack of 10 balloons that we bought, eight were “egg-ified” but two “hatched” prematurely. We were able to make six giant eggs in all.

20131225-181222.jpg

What are inside? The usual thingies that little boys (and their dads) like.

20131225-181603.jpg

It took us about five days to complete the project. Drying the eggs took up much of the time. We actually needed more time for the drying, maybe a couple more days but well, just like Santa’s little helpers, we had a deadline to meet.

The moment I had finished spattering on the last egg, the pain on my hands, shoulders, back, and legs started. Bad idea to work for hours on the floor, especially when pregnant. I’m still having a hard time moving until now.  It feels as if I actually laid the giant eggs myself!